GitLab Service User Guide
1. Introduction
The HPCMP has established a program-wide GitLab service allowing the HPCMP user community to create and manage repositories for the sharing of codes and data. The HPCMP GitLab Service is hosted on a VM cluster at the ERDC DSRC and provides both web and Kerberized Secure Shell (SSH) access to the GitLab server.
1.1. Overview
The following items provide information and a high-level overview of the HPCMP GitLab Service.
- The HPCMP GitLab Service is based on the open source GitLab software.
- The GitLab server employs a PostgreSQL database supplied with the Red Hat Linux Distribution.
- To use the HPCMP GitLab Service, users must have a valid HPCMP Portal to the
Information Environment (pIE) account and access the service from a DREN IP
address.
- For security reasons, external access or access outside of the DREN is not allowed.
- If you have an HPCMP YubiKey, you can access the web interface via the HPC portal by using the XFCE on Portal Appliance. You must trust the default DoD web certificate.
- You can get a command-line interface from any of the HPCMP unclassified HPC systems.
- Only unclassified codes and data may be stored in the GitLab repositories.
- Group creation and modification are restricted. See the section below on GitLab groups for more information.
- The HPCMP GitLab service supports Kerberized SSH access through a method known as an SSH jump host.
- GitLab Continuous Integration/Continuous Delivery (CI/CD) functionality is not supported.
- For instructions on how to configure putty to support access to Gitlab Repositories on a Windows host, see Using HPCMP GitLab with Putty on Windows.
2. Creating an Account
To create an account to use the HPCMP GitLab Service:
- Open a browser and navigate to
https://gitlab.hpc.mil.
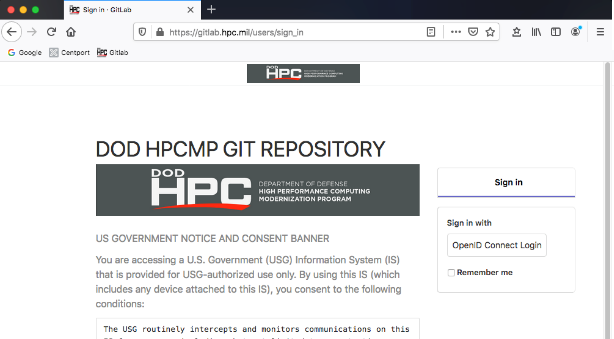
- Authenticate through OpenID Connect with either a CAC or a YubiKey.
After successfully authenticating, you will receive a message that your account is blocked.
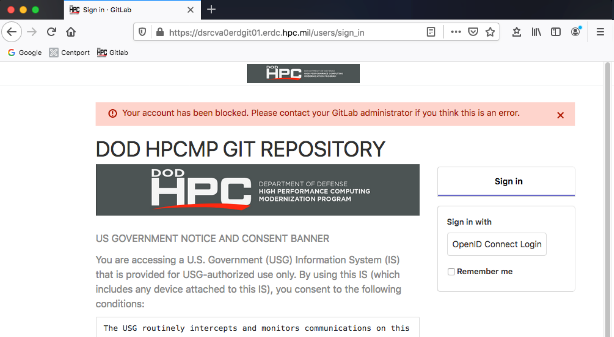
- Contact the HPCMP Help Desk to have your account unblocked or activated.
The GitLab service automatically creates your account once you authenticate using OpenID Connect the first time you log into the GitLab service. The account is created but is marked inactive and must be activated by the GitLab administrator. When the GitLab administrator has activated the account, the user is free to log into the GitLab server and create projects.
Your account will not be activated until you contact the Help Desk; it will not be automatically activated.
3. Using the Kerberized SSH interface
The HPCMP GitLab service allows for SSH command line access to the GitLab server using a command line git client. In order to enable Kerberized SSH authentication, an SSH jump host is used. The GitLab server software does not support Kerberized SSH, so an intermediary host or an SSH jump host is used to ensure Kerberos authentication when accessing the GitLab server.
To set up Kerberized SSH git access, the following steps must be performed once you have created your GitLab server account through the web interface. The steps are similar to setting up the normal or unKerberized SSH access to a GitLab server. Also, the steps below are for a Linux/UNIX system. A Microsoft Windows system will be similar, but the command names may vary, as well as the location of the SSH files.
To create a public/private key pair:
- Generate the key pair using the following command:
$ ssh-keygen -t rsa -b 4096 -C your pIE email addressThe ssh-keygen command will ask for a passphrase, which can be left blank if desired.
The ssh-keygen command will overwrite the existing id_rsa and id_rsa.pub files, but it will prompt you before overwriting. If you have existing id_rsa and id_rsa.pub files and would like to keep them, please rename them or override the ssh-keygen default filenames when prompted.
- The above ssh-keygen command will generate a public and private key and
store them in the .ssh subdirectory of your home directory.
- Copy the public key, which is the file with the .pub extension, to the GitLab server.
- The private key should remain in your .ssh directory and not be copied anywhere or shared with anyone.
To create an SSH configuration file on the client system:
- Create a .ssh/config file.
- Add the following lines to the file.
Host jumphost
    Hostname dsrcva8erdgit01.erdc.hpc.mil
Host gitlab.hpc.mil
    HostName dsrcva0erdgit01.erdc.hpc.mil
    ProxyJump jumphost
    IdentityFile ~/.ssh/id_rsa
To copy the public key generated in Step 1 to the GitLab server:
- Log into the GitLab server web interface.
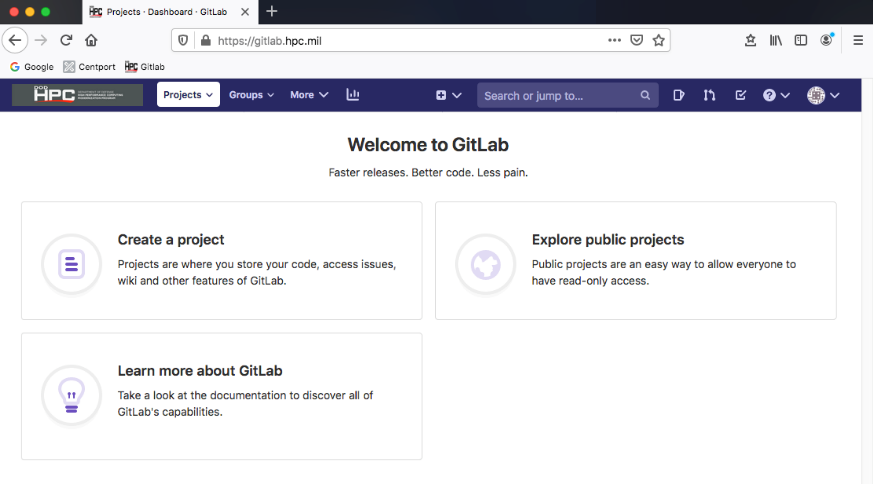
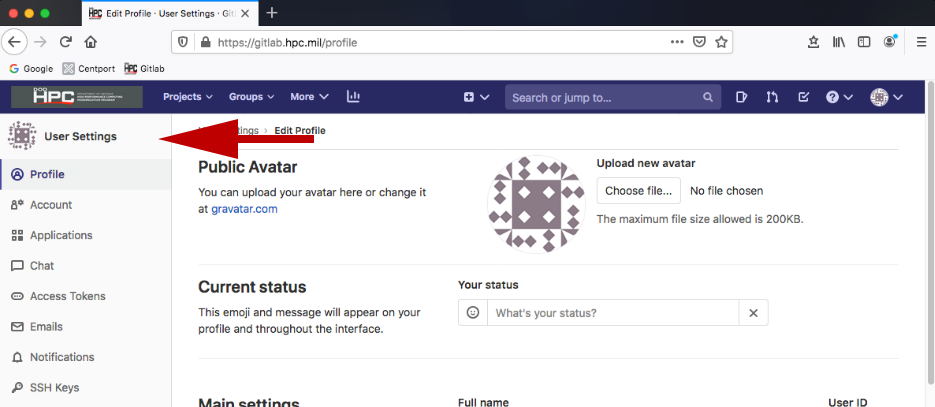
- Click the user icon in the upper, right-hand corner of the GitLab web
interface and choose Preferences.
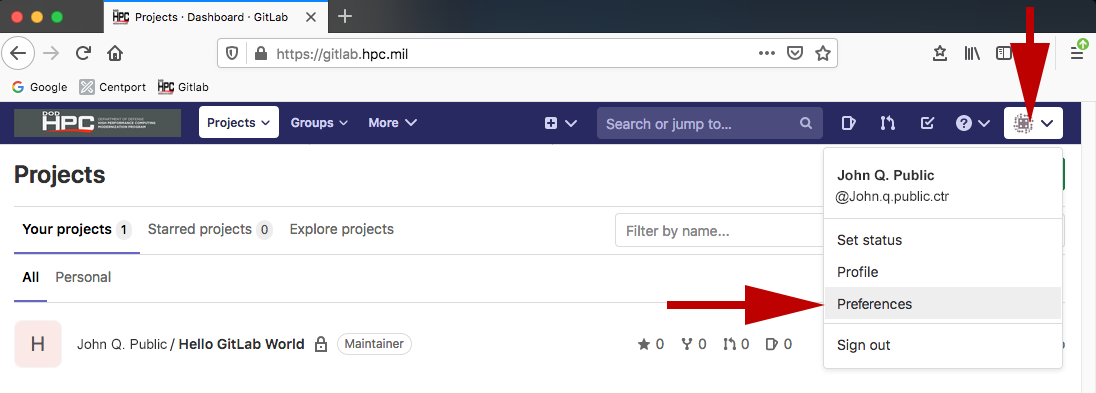
User Settings navigation will load on the left-hand side of screen.
- Choose SSH Keys on the left-hand side of the screen.
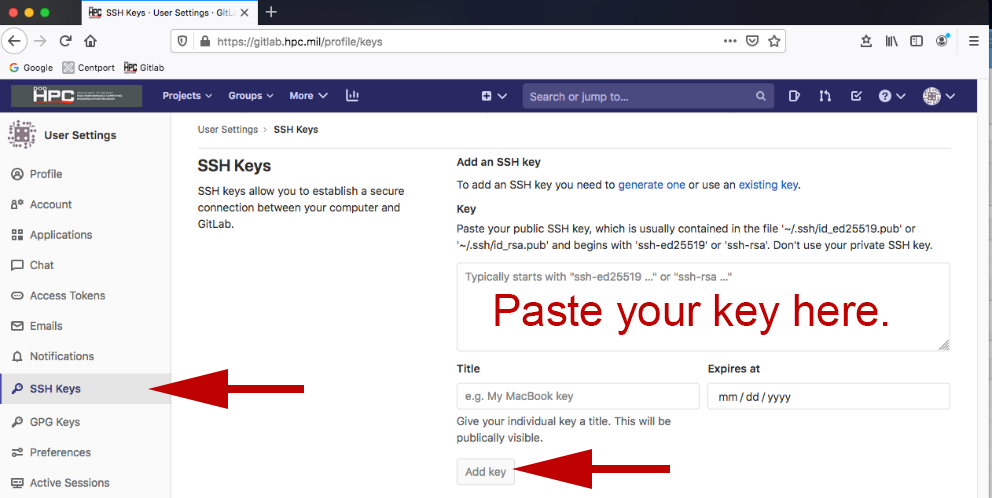
- Add your .pub key by copying it and pasting it to the appropriate area on the right and clicking Add Key.
git clone git@gitlabserver:username/repo.git- Where username is your email address without the @ suffix, and repo is the project or repository name.
- Your username can also be obtained by clicking the user info dropdown in the upper, right-hand portion of the page; username is under your full name minus the @ sign.
- Your username by default will be your pIE email address minus the @ suffix.
Example:
git clone git@gitlabserver:jane.q.doe.civ/hello-world.git- From the base page of the project you would like to share, click the Members tab
in the left hand menu options.
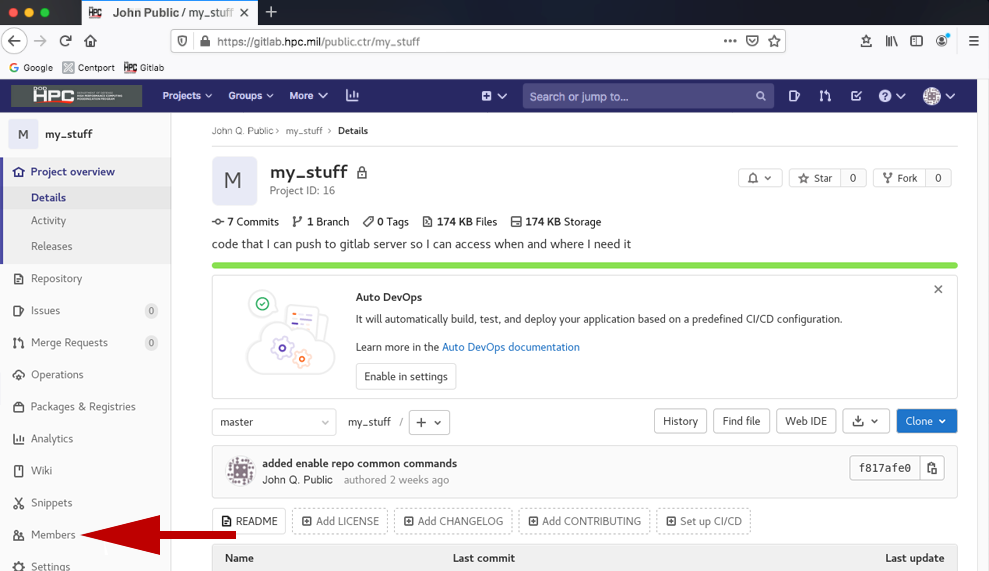
- Click the Invite member tab.
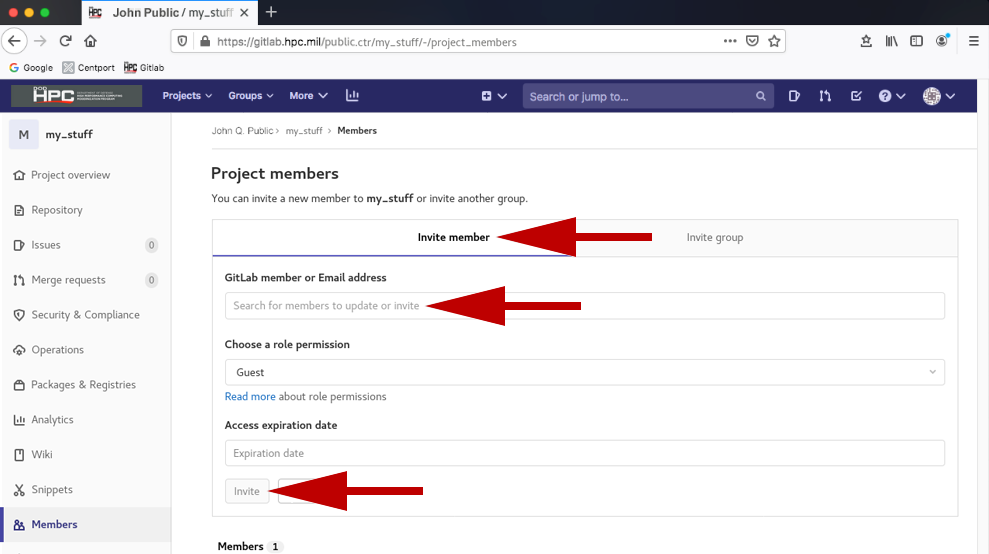
- Click the GitLab member or Email address entry field. You will be provided with a list of users on the GitLab system. Choose whom you want to add, his/her role, and whether you want access to expire at a specific date.
- Click Invite. There is a read more link under the Choose role permission so you can better assign what access a user has to your project.
To clone a repository to your local client system, use the following command:
4. GitLab Groups/Sharing Projects
4.1. Groups
In typical GitLab server installations, users are allowed to create and modify groups to allow other users access to their projects. For security reasons, the HPCMP GitLab Service was modified to prevent users from creating and modifying groups, ensuring export controlled code and data are properly protected. To create and/or modify a group, contact the HPC Help Desk.
4.2. Sharing a project
You do not need to have a group if you simply want to share a project with any of the other users on the GitLab system. To share a project with other users:
5. FAQs and Useful Links
FAQs
How do I get support for the HPCMP GitLab Service?
If you have questions or need help, please contact the HPC Help Desk at
help@helpdesk.hpc.mil.
Who is operating and maintaining the GitLab Service?
The GitLab administrator or GitLab app manager operates and maintains the
GitLab server and software.
My user account says it is "blocked." How do I unblock it?
Contact the HPC Help Desk to unblock your account.
Where is the GitLab Service hosted?
The GitLab Service is composed of multiple server virtual machines running on the ERDC
DSRC VM cluster.
Where did the group controls go in the GitLab web interface?
Group creation and modification are allowed only by the GitLab administrator.
As a result, users will not see the group controls.
Will CI/CD be supported in the future?
Possibly, but because the GitLab server software does not support Kerberos
authentication, enabling the CI/CD capability of GitLab would require a significant
development effort.
What kind of code and data can be stored in the GitLab project
repositories?
Only unclassified codes and data may be stored in the repositories.
What database is being used with the GitLab software?
PostgreSQL.
How often is the GitLab server and database software updated?
Updates to the GitLab server software are applied on a weekly basis if available.
Updates for the database software are applied as they are released from Red Hat;
the database software is part of the Red Hat Enterprise Linux distribution.
